 admin
admin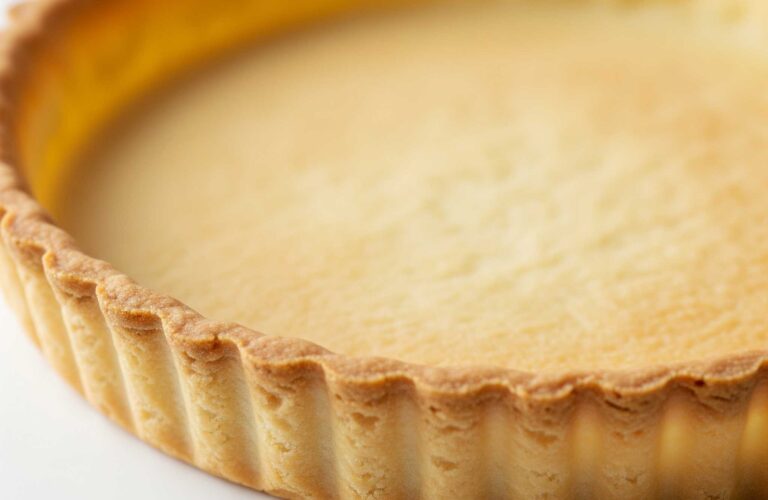
Alright, let’s talk tarts. You’ve got your dough, you’ve got your filling, and you’re ready to bake. But then comes the crucial question: Do I blind bake this crust? Or should I just fill it and send it into the oven? It is not a complicated question, but the answer can matter a lot. Get it wrong, and you’re looking at a soggy base that can be so disappointing. Get it right, and you’ve got a crisp, perfect base for whatever deliciousness you’re putting on top.
This isn’t about any fancy tricks or culinary cleverness. It’s about understanding how ingredients behave and getting to know how to make that work for you. Blind baking, or pre-baking, is exactly that: baking the tart crust without its filling. It’s a technique to solve a few common problems. It mainly ensures that your crust base does not turn into a soft sponge. It also helps to make sure it bakes through evenly. This is not always necessary, sometimes, it can even be a waste of time. So knowing when to do it and when to skip it is really the secret to a good tart.
What Exactly Is Blind Baking? The Basics.
Let’s strip it down. You make your pastry dough, roll it out, press it into your tart pan, maybe trim the edges. Instead of pouring in your filling right away, you bake that empty shell first. That’s blind baking.
Why do we do it? Think about it. Raw dough, especially a pastry dough, is full of moisture and fat. When it hits a hot oven, that moisture turns to steam. If you’ve got a wet filling sitting on top, that steam gets trapped. It cannot escape. It ends up steaming the bottom of your crust. This prevents it from drying out and crisping up. You are left with a pale, under-cooked bottom. This is a letdown when you cut into your beautiful tart.
Blind baking tackles this head-on. By only baking the crust, you give that steam a clear path to escape. The dough dries out. The starches in the flour gelatinize. The fat renders. This process creates that flaky, crisp texture everyone likes. It is a bit like building a solid foundation that you will put the walls onto. Without it, your tart might just crumble under pressure, or more accurately, turn into a soggy mess.
It’s not only about sogginess, though that’s the main culprit. Blind baking also helps with structural integrity. When you bake the dough empty, it sets its shape. It prevents the sides from slumping down and the bottom from puffing up unevenly. You get a nice, sturdy shell that can hold up to a heavy filling and give you clean slices. Plus, it ensures the crust gets a good, even golden color all the way through, not just on the edges.
So, in short, blind baking is your insurance policy against a bad crust. But like any insurance, you don’t always need to pay for it.
The Problem: Why Crusts Go Bad Without Blind Baking
Let’s dig a bit deeper into the issues blind baking solves. It’s not just a vague “soggy bottom.” There’s science to it, even if you’re just trying to bake a decent quiche.
1. The Dread of a Soggy Bottom:
This really is the the primary reason why you blind bake. Imagine your raw pastry dough. It’s got flour, butter, water. When you put a wet filling on it – say, a custard for a quiche or juicy berries for a fruit tart – and then bake it, a few things happen:
- Moisture Migration: The water from your filling starts to seep into the raw dough. It’s like putting a wet sponge on a dry cracker. The cracker gets soft.
- Steam Trap: As the oven heats up, the moisture within the dough tries to escape as steam. At the same time, the moisture from the filling also turns to steam. If there’s a heavy, wet filling on top, that steam gets trapped between the filling and the crust. It can’t evaporate properly.
- Steaming, Not Baking: Instead of baking and drying out, the bottom of your crust ends up steaming. It cooks, sure, but it never gets that crisp, golden texture. It stays pale, soft, and often gummy or pasty. It’s the culinary equivalent of a wet handshake. Nobody wants it.
This is especially true for fillings that are liquid or semi-liquid when they go into the oven. It also applies to those that release a lot of water as they cook. Think about a fruit tart with fresh berries. Those berries are going to release a lot of juice. If that juice has nowhere to go but into your raw crust, you’re in trouble.
2. Structural Collapse and Slumping: Pastry dough, especially one made with butter, can be delicate. When it heats up, the butter melts, and the dough softens before it sets. If you’ve got a tall tart shell, wait before filling it. Filling it right away can cause the sides to slump down into the middle. You end up with a squat, misshapen tart instead of a crisp, defined edge. Blind baking allows the dough time to firm up. This helps it set its structure. Then, it can bear the weight of a heavy filling. It’s like letting concrete cure before you drive a truck over it.
3. Uneven Cooking and Pale Spots: Sometimes, your filling might cook much faster than your crust. A delicate custard might set in 20-30 minutes. However, your raw pastry might need 40-50 minutes to cook through and get golden. If you bake them together, you pull the tart out when the custard is perfect. Unfortunately, the bottom of your crust is still pale, soft, and undercooked. Blind baking ensures the crust is already mostly or fully cooked. This way, it can finish up alongside the filling without holding things back. It guarantees that golden-brown color and crisp texture all the way around.
4. Puffing and Bubbling: Raw pastry dough can puff up in the oven. This happens even if you don’t have a wet filling. Steam gets trapped under the base, creating large bubbles that distort the shape of your crust. This is why you prick the dough with a fork (docking) and use pie weights during blind baking. The weights hold the dough down, and the pricks allow steam to escape, ensuring a flat, even bottom. Without blind baking, you might end up with a lumpy, uneven base that’s tough to fill neatly.
So, blind baking isn’t just a suggestion; it’s a practical solution to these common baking headaches.
When to Blind Bake: Your Best Defense
Now that we know why we blind bake, let’s get specific about when you absolutely should do it. Consider these scenarios your green light for pre-baking that crust.
1. Tarts with Wet, Liquid, or High-Moisture Fillings: This is the number one reason. If your filling is going to be runny, creamy, or release a lot of water during baking, blind bake. Period.
- Custard Tarts: Think quiches (Lorraine, spinach, mushroom), crème brûlée tarts, pumpkin pies, sweet potato pies, or any tart with a milk- or cream-based filling. These fillings are basically liquid when they go in, and they’ll steam your crust from the inside out if you don’t pre-bake.
- Fresh Fruit Tarts (especially with a creamy base): If you’re using fresh berries, sliced peaches, plums, or apples that are going to get juicy in the oven, or if your tart has a layer of pastry cream or a light custard under the fruit, blind baking is crucial. The fruit juices will seep into the crust, and the creamy base will just add to the moisture problem.
- Lemon Meringue Tarts/Key Lime Tarts: These have very acidic, liquid fillings that set as they bake. The acidity can also interact with raw dough in unpleasant ways. A fully blind-baked, crisp crust is essential for these.
- Savory Tarts with Veggies: If you’re making a savory tart with vegetables like spinach, mushrooms, or onions, especially if they’re not fully cooked down and dried out beforehand, they’ll release moisture. Blind baking provides that necessary barrier.
2. Tarts with No-Bake or Chilled Fillings: This is a no-brainer. If your filling doesn’t go into the oven at all, or only gets a very quick chill to set, your crust must be fully cooked beforehand.
- Chocolate Ganache Tarts: You pour warm ganache into a crust, then chill it. The crust needs to be perfectly crisp and done.
- Fresh Fruit Tarts with Pastry Cream: You blind bake the crust, let it cool, fill it with pre-made pastry cream, and then arrange fresh fruit on top. The crust is the only baked component.
- Mousse Tarts: Similar to ganache, a mousse filling is usually chilled to set. The crust provides the foundation.
- Cheesecake Tarts (no-bake varieties): If your cheesecake filling isn’t baked, the crust needs to be.
3. When the Filling Has a Short Baking Time: Some delicate fillings set very quickly. If your filling is done in 15-20 minutes, but your raw pastry needs 30-40 minutes to cook through, you’ve got a problem. Blind baking ensures the crust is already mostly or fully cooked, so it can finish up alongside the fast-cooking filling without being underdone. This prevents you from having to overcook your filling just to get the crust done.
4. To Achieve the best Crispness and Even Color: Even for fillings that aren’t super wet, blind baking gives you more control over the crust’s texture and appearance. If you want a truly golden, shatteringly crisp crust, blind baking allows it to dry out and brown evenly without interference from a filling. It’s about optimizing the crust for its own sake.
5. To Prevent to much Shrinkage or Bubbling: While chilling the dough helps, blind baking with pie weights is the best way to ensure your tart shell holds its shape perfectly. The weights keep the sides from slumping and the bottom from puffing up, giving you a beautiful, uniform cavity for your filling. This is especially important for tarts where presentation matters, or where an uneven base would make filling difficult.
In essence, if there’s any doubt about moisture, structure, or even cooking, blind bake. It’s a small extra step that can save you a lot of grief.
When to Skip Blind Baking: Don’t Do Extra Work when do not have to
Now, let’s talk about when you can save yourself some time and effort. Blind baking isn’t always necessary, and sometimes, it can even be a slight disadvantage.
1. Tarts with Dry or Low-Moisture Fillings That Have Long Baking Times: This is the main exception. If your filling is relatively dry and needs a long time in the oven to cook through, the crust will likely have enough time to bake and crisp up alongside it.
- Pecan Pie: This is a classic example where opinions are divided. Many recipes call for blind baking, but many home bakers successfully make pecan pie without it. The filling is sweet and dense, and it bakes for a good 45-60 minutes, giving the crust ample time to cook through. If you’re confident in your oven and your crust recipe, you might skip it here.
- Certain Nut Tarts (e.g., Frangipane-based): A frangipane filling (almond cream) is fairly dense and cooks for a good while. The moisture content is lower than a custard. Often, these tarts don’t require blind baking, as the long bake time allows the crust to cook through.
- Very Dense, Firm Fillings: If your tart has a filling that’s almost solid and doesn’t release much moisture, and it needs a long bake, you might be able to skip blind baking.
2. When a Slightly Softer Crust is Acceptable or Desired: This is rare, but sometimes a recipe might intentionally aim for a crust that’s a bit softer and more integrated with the filling. If that’s the case, skipping the blind bake might be part of the design. For most tarts, though, crisp is king.
3. When You’re Short on Time and the Risk is Low: Let’s be real. Sometimes you just need to get a tart done. If you’re making a simple apple tart with a relatively thick, spiced apple filling that’s going to bake for an hour, and you’re not aiming for Michelin-star perfection, you might decide the risk of a slightly less crisp bottom is worth saving 20-30 minutes of prep time. This is a judgment call based on your experience and the specific recipe. Just be aware of the potential trade-off.
Important Note: Even in these “skip blind baking” scenarios, you still need to ensure your dough is well-chilled and pricked to prevent puffing. The principles of good pastry still apply.
How to Blind Bake: The Step-by-Step Playbook
Okay, so you’ve decided to blind bake. Good call. Here’s how you do it, no fancy equipment needed beyond some weights.
1. Prepare Your Dough:
- Cold is Key: Start with cold butter or fat in your dough. This creates those flaky layers. Don’t overwork the dough; you want to develop just enough gluten for structure, but not so much that it becomes tough.
- Resting Time: After you mix your dough, wrap it tightly and chill it in the fridge for at least 30 minutes, or up to a couple of days. This allows the gluten to relax, making it easier to roll, and firms up the fat.
2. Roll and Line Your Pan:
- Even Thickness: Roll your dough out to an even thickness, usually about 1/8 inch (3mm). Uneven dough will bake unevenly.
- Fit the Pan: Carefully transfer the dough to your tart pan (a removable bottom pan is best for tarts). Press it gently into the corners and up the sides. Don’t stretch it, or it will shrink back.
- Trim the Edges: Trim any excess dough, leaving a slight overhang if you plan to flute the edges, or trim flush with the rim.
3. The Crucial Second Chill:
- Don’t Skip This: After you’ve lined the pan, put the whole thing back in the fridge (or freezer for 15-20 minutes) for at least another 30 minutes. This is CRITICAL. The chilling firms up the butter and relaxes the gluten after it’s been worked into the pan. This is your best defense against shrinkage. If you put warm, recently worked dough into a hot oven, it will shrink like crazy.
4. Prick (Dock) the Dough:
- Why: This creates small holes in the bottom of the crust. These holes act as vents, allowing steam to escape from under the dough during baking. If you don’t prick it, that steam can build up and create big, unsightly bubbles in the base.
- How: Use a fork and prick the bottom of the crust all over, fairly evenly spaced. Don’t go through the sides, just the bottom.
5. Line with Parchment Paper or Foil:
- Purpose: This layer sits between your dough and your pie weights. It prevents the weights from sticking to the dough and makes them easy to remove.
- Method: Take a piece of parchment paper or aluminum foil (parchment is generally preferred as it’s less likely to stick) and gently press it into the chilled, pricked tart shell. Make sure it conforms to the curves of the pan, especially in the corners and up the sides. Leave an overhang to make removal easy.
6. Add Your Pie Weights:
- What to Use: Ceramic pie weights are ideal because they hold heat well and are reusable. If you don’t have them, dried beans (like kidney beans or chickpeas) or uncooked rice work perfectly fine. Just know that once used for baking, they’re generally not good for cooking anymore.
- How Much: Fill the lined crust all the way to the top with your weights. Don’t skimp. You want enough weight to hold the dough firmly against the pan’s surface, preventing both puffing and slumping of the sides.
7. Bake It:
- Preheat: Get your oven to the specified temperature, usually between 375°F and 425°F (190°C and 220°C). A hot oven helps set the crust quickly.
- Partial Blind Bake (for wet fillings that will be baked further):
- Bake for about 15-20 minutes, or until the edges are set and lightly golden, and the bottom looks dry and opaque.
- Carefully remove the parchment paper and pie weights.
- Return the crust to the oven for another 5-10 minutes, or until the bottom is lightly golden and looks dry. This step helps dry out the very bottom where the weights were.
- Remove from oven, cool slightly, then add your filling and continue baking.
- Full Blind Bake (for no-bake or chilled fillings):
- Bake for about 15-20 minutes with the weights, as above.
- Remove the parchment paper and pie weights.
- Return the crust to the oven for another 10-15 minutes, or until the entire crust, including the bottom, is golden brown and looks fully cooked and crisp. It should sound hollow when tapped.
- Remove from oven and cool completely on a wire rack before filling. If you fill a warm crust, it can make the filling melt or become watery.
8. Cool Down:
- Always let your blind-baked crust cool completely on a wire rack before you fill it, especially if it’s for a no-bake filling. This allows it to fully crisp up and prevents condensation from forming and making it soggy again.
Tips for Success: Beyond the Steps
Even with the playbook, a few extra pointers can make a difference.
- Don’t Overwork the Dough (Again): I’m repeating this because it’s that important. Overworking develops too much gluten, leading to a tough, chewy crust instead of a tender, flaky one. Mix just until combined.
- Chill, Chill, Chill (Always): Seriously, don’t rush the chilling steps. Cold dough is cooperative dough. It shrinks less, handles better, and bakes more evenly.
- Use Enough Weights: This isn’t the place to economize. Fill that shell to the brim. If you don’t have enough, the bottom will puff, and the sides might slump.
- Hot Oven, Quick Set: A good hot oven helps the crust set quickly, minimizing shrinkage and maximizing crispness.
- Watch Your Edges: Sometimes the edges of the crust brown faster than the bottom. If they’re getting too dark, you can loosely cover them with strips of aluminum foil during the last part of baking.
- Egg Wash (Optional Sealing): For a really crisp, sealed crust, especially for very wet fillings, you can brush the partially blind-baked crust (after removing weights and parchment) with a thin layer of egg white or a whole egg wash. This creates a protective barrier that helps prevent moisture from seeping in. Bake for a few more minutes to set the wash before adding the filling.
- Troubleshooting Shrinkage: If your crust still shrinks, it’s almost always due to insufficient chilling or overworking the dough. Make sure your dough is ice-cold when it goes into the oven.
- Troubleshooting Puffing: If the bottom still puffs, you didn’t prick it enough, or you didn’t use enough weights.
- Troubleshooting Soggy Bottom (After Blind Baking): If you blind baked and still got a soggy bottom, it might be that your filling was exceptionally wet, or you didn’t bake the crust long enough in the second stage (after removing weights) to fully dry it out. Ensure the bottom is truly golden and crisp before adding the filling.
The Final Word: It’s Your Call
Ultimately, the decision to blind bake or not comes down to a few factors: the moisture content of your filling, the desired texture of your crust, and how much time you have.
For most tarts with wet fillings – quiches, custards, juicy fruit tarts – blind baking is non-negotiable if you want a professional-quality, crisp crust. It’s an extra step, but it’s a critical one that prevents disappointment. For no-bake tarts, it’s simply a requirement.
For drier fillings that bake for a long time, you might be able to get away with skipping it. But even then, many experienced bakers will still do a partial blind bake just for insurance and to guarantee that perfectly crisp base.
Don’t overthink it, but don’t ignore it either. Understand the “why” behind the technique, look at your recipe and your ingredients, and make an informed decision. A well-made tart, with a perfectly crisp crust, is one of the most satisfying things you can pull out of an oven. Nail this step, and you’re well on your way to baking glory!